
Kubernetes or K8s for short is a container orchestration and management tool use to deploy and manage several containers or pods. We can setup kubernetes on a single node cluster or multiple clusters. With Talos Linus OS, we simplify this option of setting up Kubernetes Cluster.
In this tutorial we will explore how to setup a simple K8s cluster via Talos Linux. Here is the overview of our cluster setup.
- Control Plane /Master Node: this will be the main node that manages and orchestrate the other task
- Worker Node: this will be the nodes that the deployments will run upon
- Talosctl: this is a CLI tool that serves as middle man or interface to our k8s cluster

Setting Up Talos Linux – Master Node
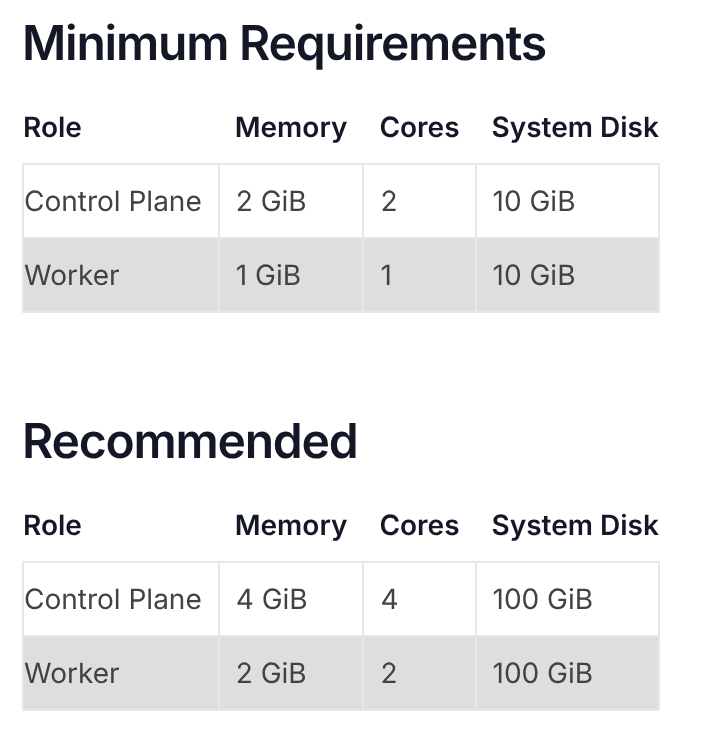
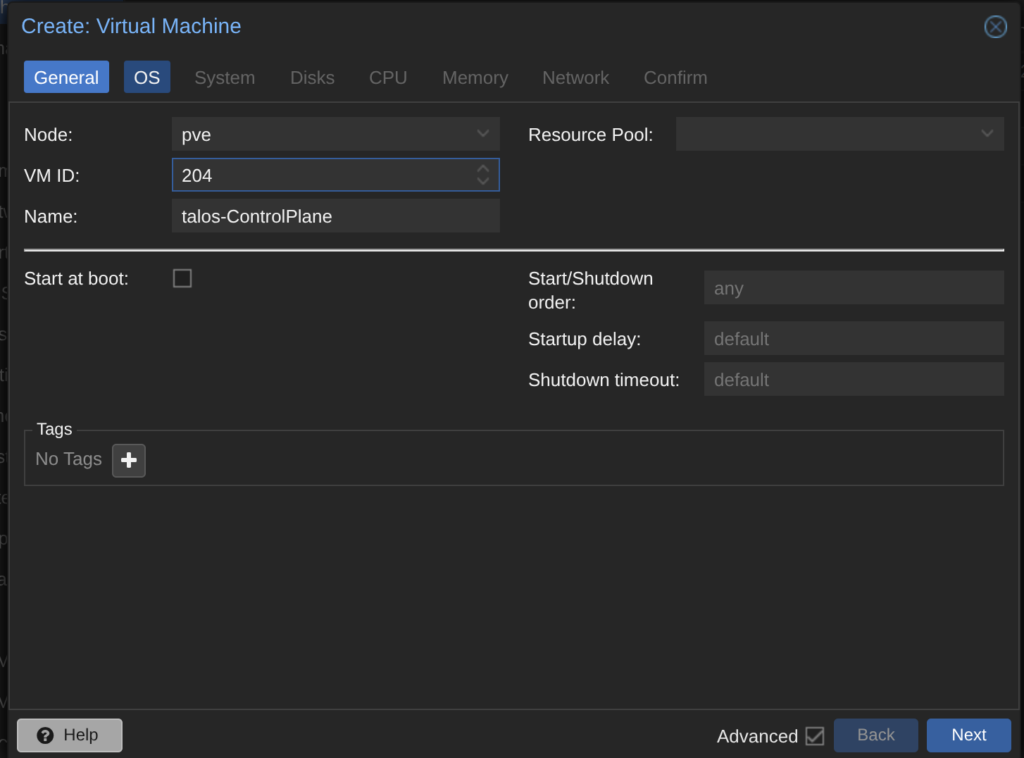
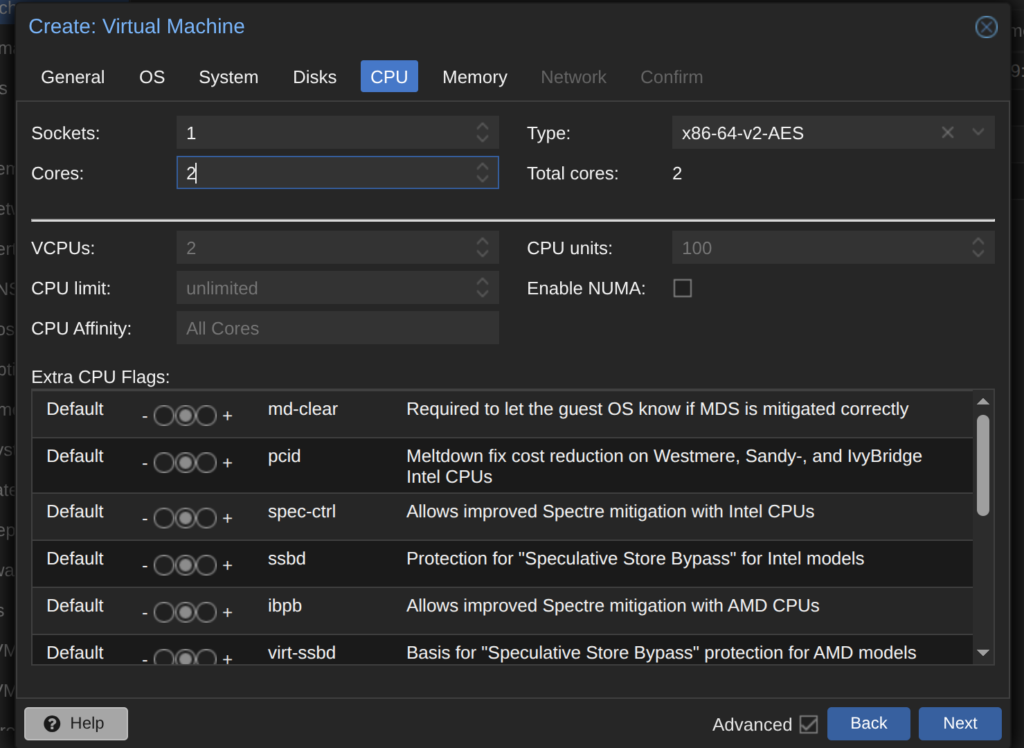
First we will have to create a virtual machine from the Talos Linux ISO image in proxmox. The general system requirements includes the following
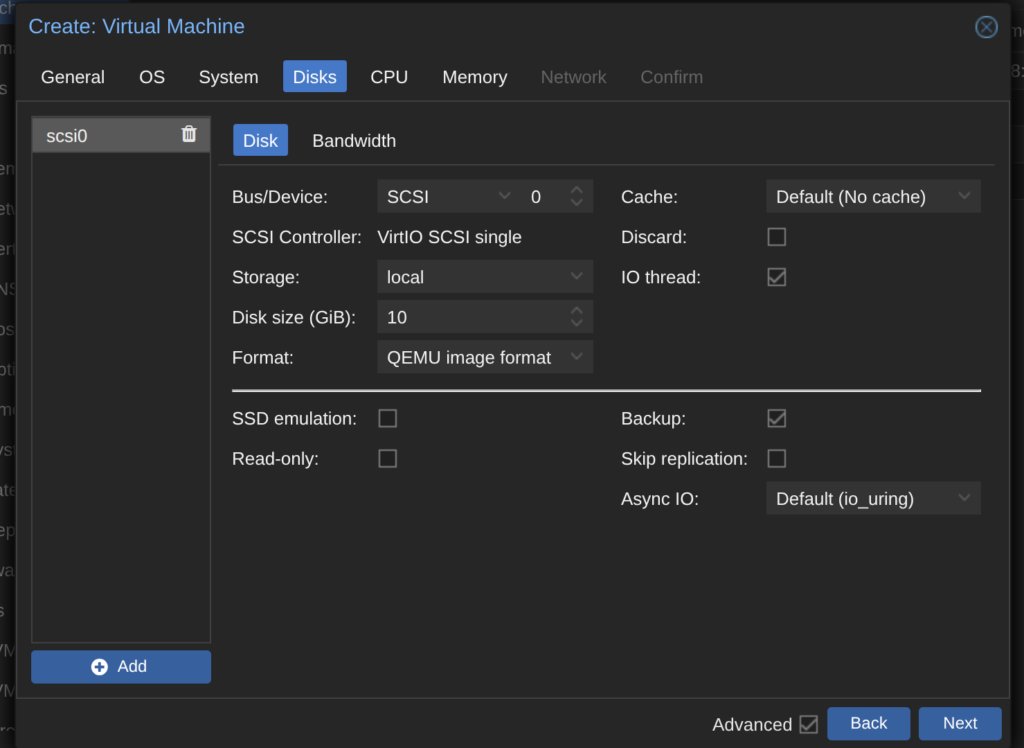
- 2Gig of RAM, 2 Cores and 10 Gig of Hard Disk Storage
- 1 Gig of Ram, 1 Core and 10 Gig of Hard Disk Storage
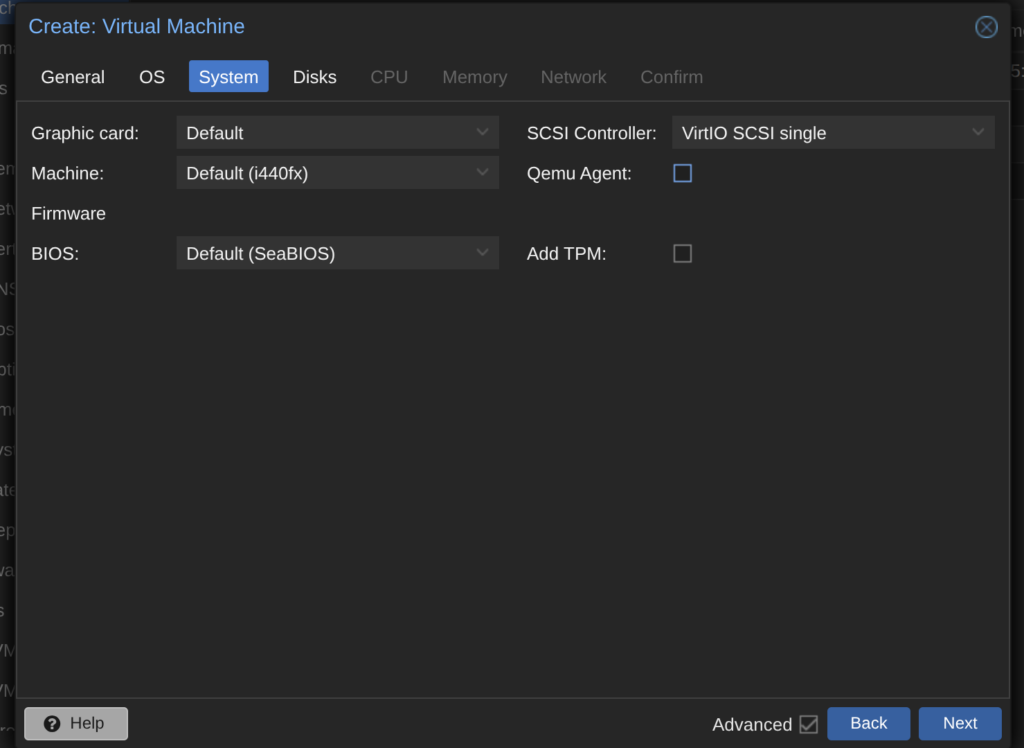
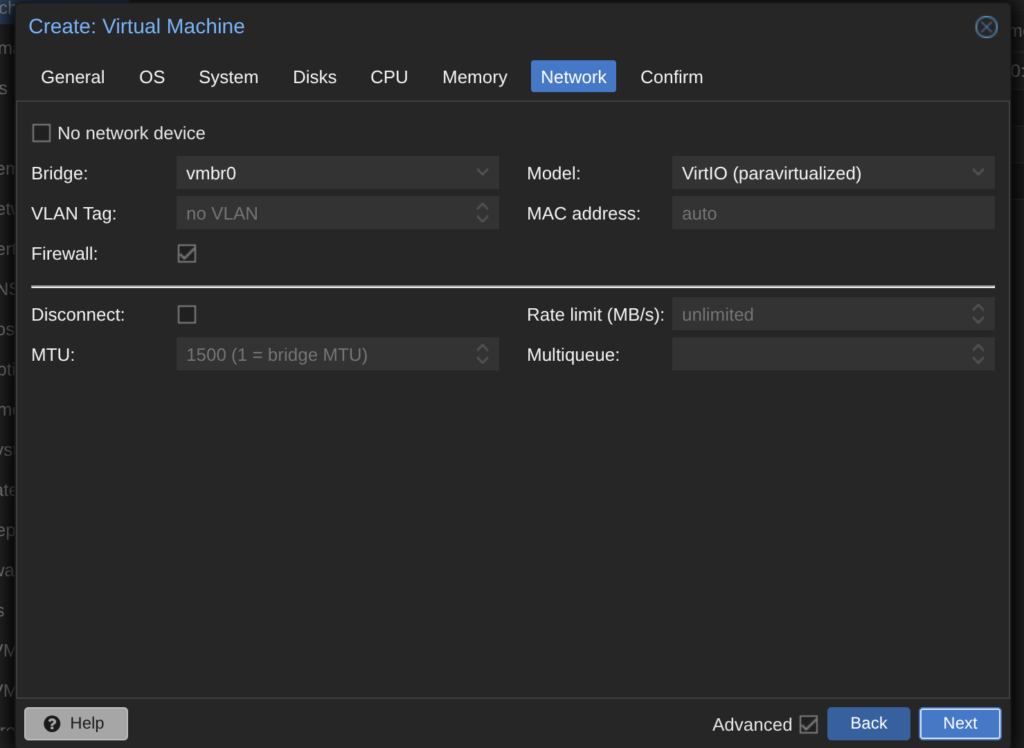
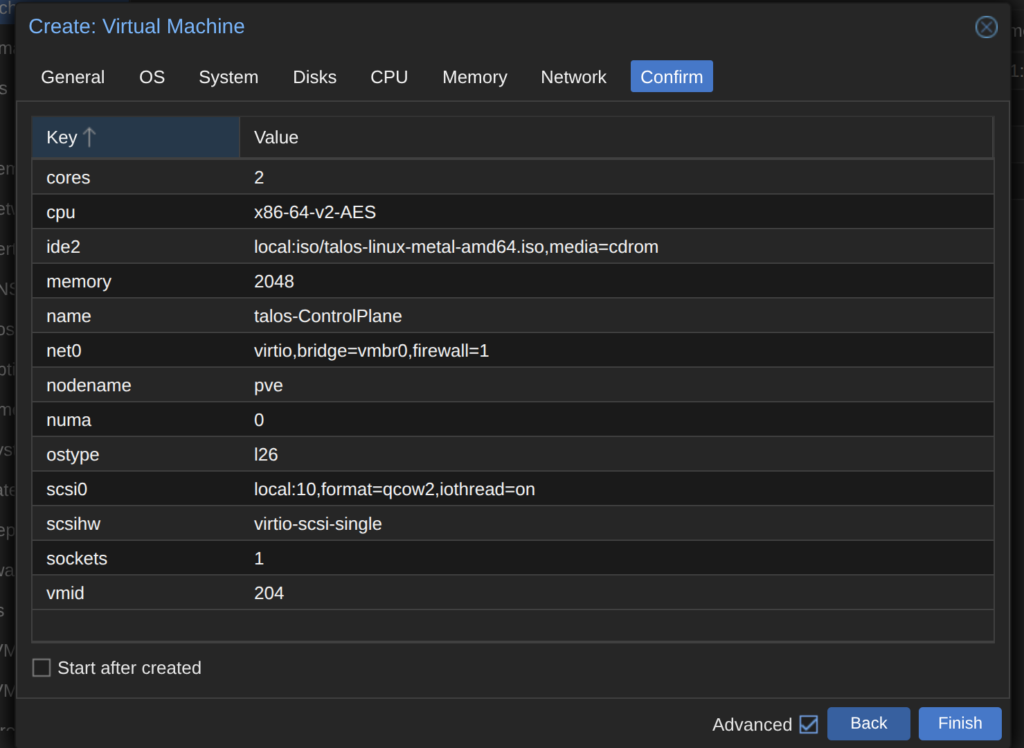
Create Talos Linux VM


We will repeat the above steps of creating the VM for the individual worker nodes

By default we can rely on DHCP to generate dynamic IP address during setup ( 192.168.0.x). This is the IP for the control plane that we will use when interacting with our Control Plane Node. However you can also setup a static IP address.

Create and Configure Our Control Plane and Worker Nodes
Via talosctl, we will generate the configurations for our control plane/Master Node and also for our individual Worker Nodes.
These configurations include the cluster configurations, talos configuration and kubeconfigs files.
# Generate Config
talosctl gen config proxmox-k8s-cluster https://192.168.0.22:6443 --output-dir cluster_config
# Create Control Plane Node
talosctl apply-config --insecure --nodes 192.168.0.22 --file cluster_config/controlplane.yaml
# Create Worker Node
talosctl apply-config --insecure --nodes 192.168.0.77 --file cluster_config/worker.yaml
# Using the cluster
export TALOSCONFIG="cluster_config/talosconfig"
talosctl config endpoint 192.168.0.22 # $CONTROL_PLANE_IP
talosctl config node 192.168.0.22 # $CONTROL_PLANE_IP
# Bootstrap etcd
talosctl bootstrap
# retrieve kubeconfig
talosctl kubeconfig .
# dmesg
talosctl dmesg
talosctl containers -k
talosctl logs
# export KUBECONFIG=./kubeconfig
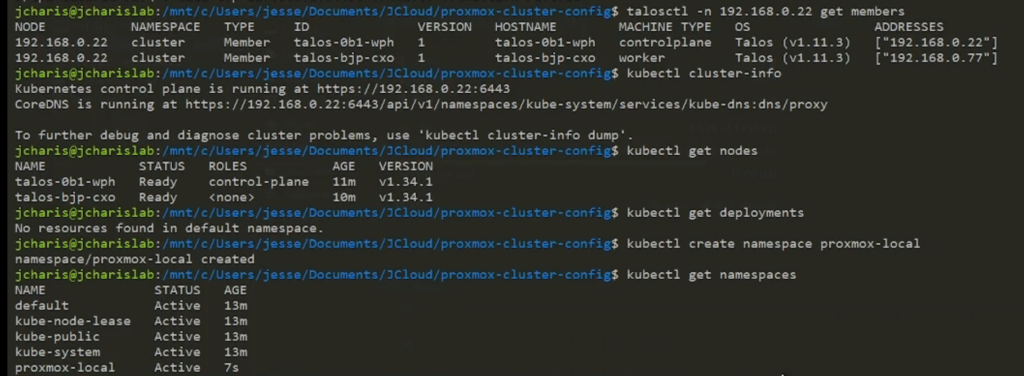
# kubectl commands
kubectl get nodes
Setting Up Static IP Address For Our Clusters
If you want to control how our IP address are assigned to our cluster we can set up a static IP address during setup.
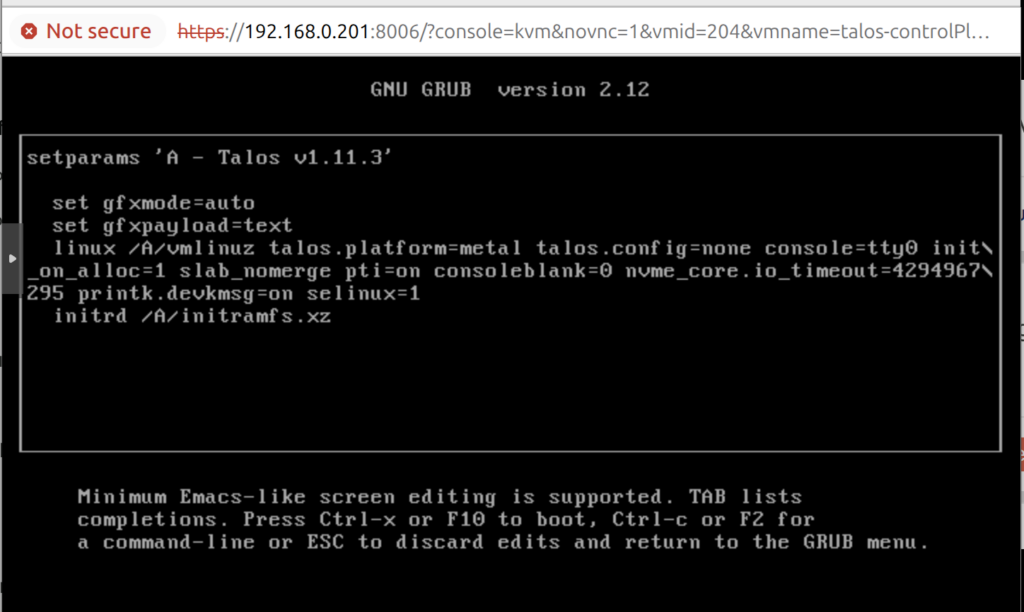
- Enter the edit mode (press ‘e’) on the Talos BootMenu
- Add your static IP address as below
ip=<client-ip>:<srv-ip>:<gw-ip>:<netmask>:<host>:<device>:<autoconf>In our case we will have 203 as our MasterNode/ ControlPlane IP and 204, 205 as our WorkerNodes IP
ip=192.168.0.203::192.168.0.1:255.255.255.0::enps01:off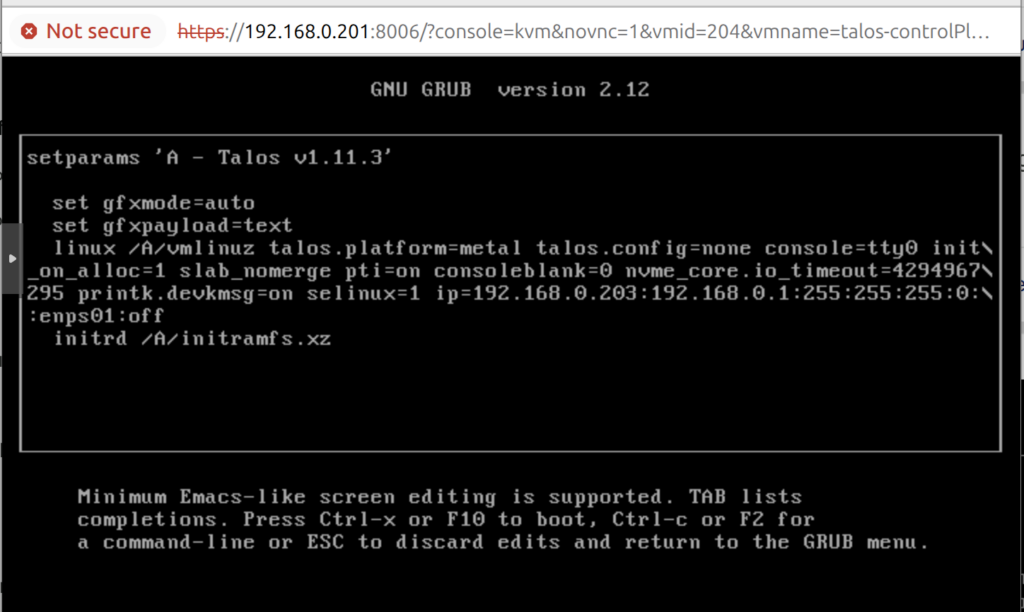
Then press Ctrl-x or F10
We have seen how to create a 3 Node Kubernetes Cluster using Talos Linux on Proxmox. You can now use kubectl or talosctl to manage your kubernetes deployment.
For monitoring you can use
- k9s
- Freelens
- Rancher Desktop
Remember to always point to the same KUBECONFIG that was generated with talosctl kubeconfig .
You can also check out the video tutorial for the entire steps below.
Happy Coding and Building
By Jesse E.Agbe(JCharis)