In a previous tutorial we learnt about the various ways of productionizing and deploying machine learning models and one of the ways is to use docker. In this tutorial we will be using docker to deploy our streamlit app.
What is Docker? Docker is a platform for developers and sysadmins to build, share and run applications with containers.
Installing Docker on Ubuntu
sudo apt install apt-transport-https ca-certificates curl software-properties-common

curl -fsSL https://download.docker.com/linux/ubuntu/gpg | sudo apt-key add -
Verify Fingerprint
sudo apt-key fingerprint 0EBFCD88
Add Docker to Apt Repo Locally
sudo add-apt-repository \
"deb [arch=amd64] https://download.docker.com/linux/ubuntu \
$(lsb_release -cs) \
stable"
Update,Download and Install Docker Community Edition
sudo apt-get update
sudo apt-get install docker-ce docker-ce-cli containerd.io
Check Status of Docker
sudo systemctl status docker
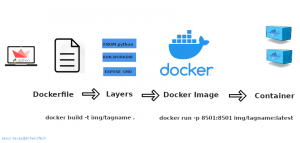
Let us see the workflow
- Build Our App
- Run our App locally
- Create A Dockerfile
- Build Our Docker Image
- Run our App in Docker
Building A Streamlit App
First of all let us set up a virtual environment where we will build our app. This is recommended if you want to maintain and have the same versions of packages in your requirements.txt file to make it easily producible.
pipenv install streamlit pandas
Activate our virtualenv
pipenv shell
We will then create a requirements.txt file with
pipenv lock -r > requirements.txt
Our basic app will be something like this
import streamlit as st

def main():
	"""Deploying Streamlit App In Docker"""

	st.title("Streamlit App")
	st.header("Deploying Streamlit in Docker")


	activities = ["EDA","Plots"]

	choices = st.sidebar.selectbox('Select Activities',activities)

	if choices == 'EDA':
		st.subheader("EDA")

	elif choices == 'Plots':
		st.subheader("Visualization")


if __name__ == '__main__':
	main()
We can then check and see if everything works by running it with streamlit as
streamlit run app.py
Now that our app is working we can move on to the next step
Create A Dockerfile
A Dockerfile is a file that contains instructions on what and how to build a docker image. This is an automated process that operate by building the images based on layer or steps hence order is very important in creating a dockerfile. The name of the file must be Dockerfile without any extension.
The basic set of instructions for any dockerfile include
FROM <image>: this is from where you want to build the base image or operating system.
RUN <command>: this command tells the docker daemon to run a set of commands or programs either via
- shell form : RUN pip install -r requirements.txt
- the exec form: RUN [“pip”,”install”,”-r”,”requirements.txt”]
WORKDIR <directory>: this shows the working directory we will be setting up within our image
ENTRYPOINT [commands] : Allows for configuring the container as an executable.The entrypoint is similar to the CMD in that they serve as a point for what command to run in the container not the image, but rather when you create a container from an image.
CMD <commands>: this is used to provide defaults for an executing container. You can use the shell form or the exec form . When you use both together it is recommended to use it in the exec form that follows the JSON array format.
EXPOSE <port>: This informs Docker that the container is exposed to listen on the specified port at runtime.
COPY <source> <destination> :For copying files from one place to the image.
We will be using a base image with python3.7 already prepared. This saves us a lot of time to continue with the other steps.
We will then place our instructions and steps in the Dockerfile like below.(You can create you own steps as you wish)
This is the Dockerfile we will be using without a requirements.txt file
FROM python:3.7
COPY . /app
WORKDIR /app
RUN pip install streamlit
EXPOSE 8501
ENTRYPOINT ["streamlit","run"]
CMD ["app.py"]
This is the Dockerfile we will be using a requirements.txt file
FROM python:3.7
COPY . /app
WORKDIR /app
RUN pip install -r requirements.txt
EXPOSE 8501
ENTRYPOINT ["streamlit","run"]
CMD ["app.py"]
Building the Image
To build an image you can run the following command
docker build -t <imagename and tagname> .
or with the -f option if you don’t want to look for the dockerfile in the current directory or context.
(This is useful for when you have one dockerfile for production and another for development)
docker build -t <imagename and tagname> -f Dockerfile
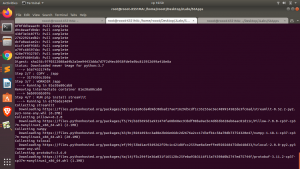
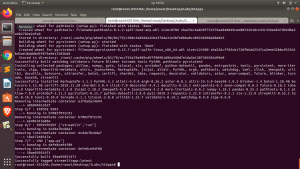
This will build a docker image with the name specified and will contain all the necessary requirement to run the app.
To check for the docker images you can use
docker images
docker images ls
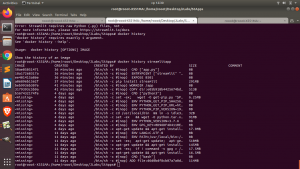
You can also check for the history of the images using
docker history yourcustom_image
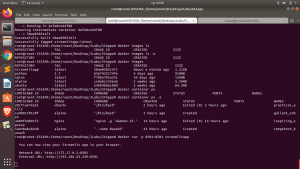
Running The Containerized App
To run our app you can then create a container from the image which will behave like a mini computer with everything that is required to run the app as if you were running it on your local system.
docker run -p 8501:8501 your_streamlitapp:latest
You can then navigate to the url given in your browser using the external network url.

There are also some interesting and useful Dockerfiles you can use below.
- https://github.com/MarcSkovMadsen/awesome-streamlit/tree/master/devops/docker
- https://github.com/domoritz/streamlit-docker/blob/master/Dockerfile
You can check the video tutorials here
Thanks For Your Time
Jesus Saves
By Jesse E.Agbe(JCharis)
Thanks Jesse for the great tutorial. You wrote above “There are also some interesting and useful Dockerfiles you can use below”, but I cannot seem to find any files. Can you please post them?
Hello Hans, thanks for notifying me. I did not notice I left them out.
The Links
https://github.com/MarcSkovMadsen/awesome-streamlit/tree/master/devops/docker
https://github.com/domoritz/streamlit-docker/blob/master/Dockerfile
Hope it helps. Thanks once again
Heya i抦 for the first time here. I came across this board and I find It truly useful & it helped me out much. I hope to give something back and aid others like you aided me.