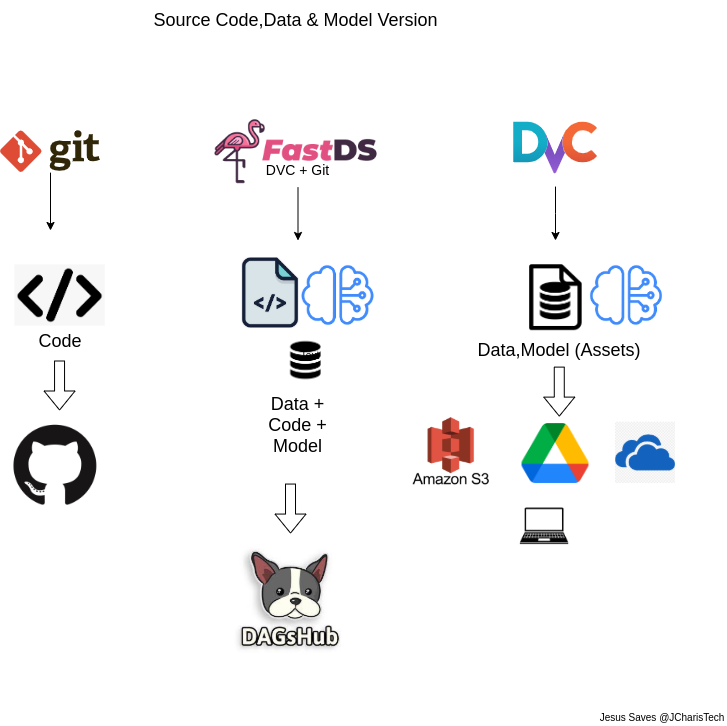
DagsHub is a platform for data scientists and machine learning engineers to version their data, models, experiments, and code. In a way it is like Github for Data Scientists and ML Engineers. It is where Data Scientists build their ML projects without any external and complicated devops. It seeks to simplify MLOps for everyone.
It allows you and your data science team to easily share, review, and reuse your work, with a GitHub -like feel but for machine learning and data science in general. Dagshub is built on top of several data science libraries and frameworks such as MLflow,DVC,etc.
Some of the cool features and benefits of DagsHub include but not limited to
- Data Version Control
- Experiment Tracking
- MLflow Intergration
- ML Pipeline Visualization
- Git and DVC integration
- Label Annotation via the Label Studio
- ML Metrics Comparison
- etc
Let us see how to work with dagshub. By the end of this tutorial you will learn
- What is Dagshub
- How to Create an Account and Repository on Dagshub
- How to use DVC
- etc
First of all we will create an account on DagsHub here.
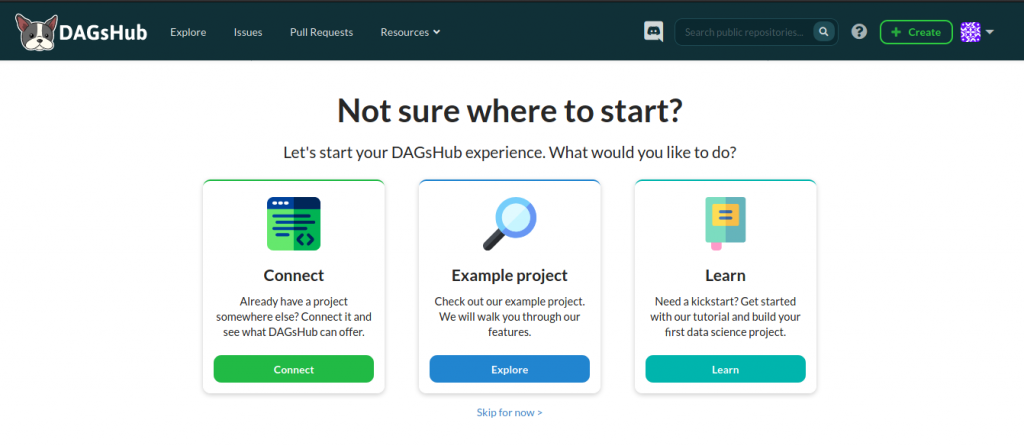
After creating an account on dagshub you will be sent a verification link in your email. Click on the link to get access to your newly created dagshub account. You would be welcomed with this page.
The interface of DagsHub looks similar to that of Github hence it will be easy to navigate if you have a github account already.
However the main components of DagsHub based on its driving goal for data science and ML project workflow includes the following
- Repositories: where you can store files,models and datasets as well as your source code.
- Experiments
- Annotations
- etc

With Dagshub you can track your ML projects, experiments and source code all in one place..
Beginning an ML Project on Dagshub
By the end of this section we will see how to use the Dagshub platform to build and track our end to end ML project.
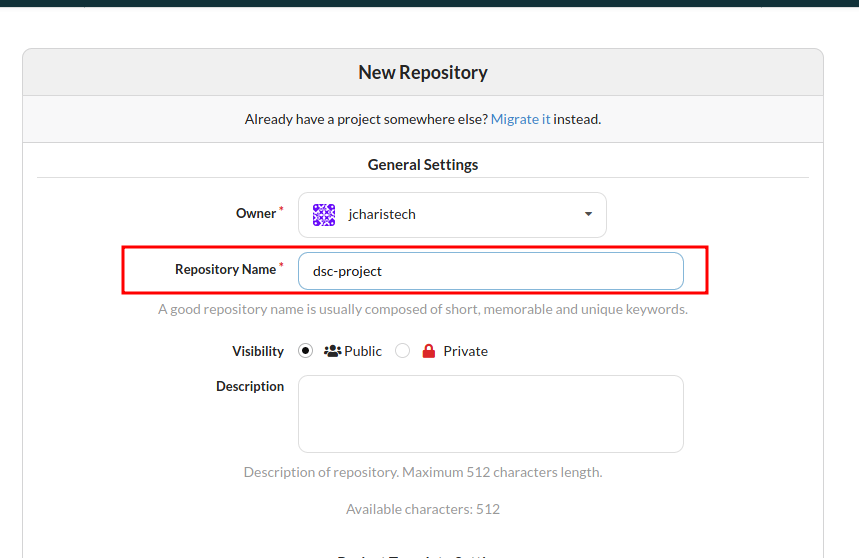
First let us create a repository where we will be hosting our data,model,artifacts and source code for our project.You can do that on the platform like below. Select the New Repository to create a repository

This will lead you to the next page where you can enter the name of the repository and other details.. You can make it public to make it accessible to everyone just like Github.
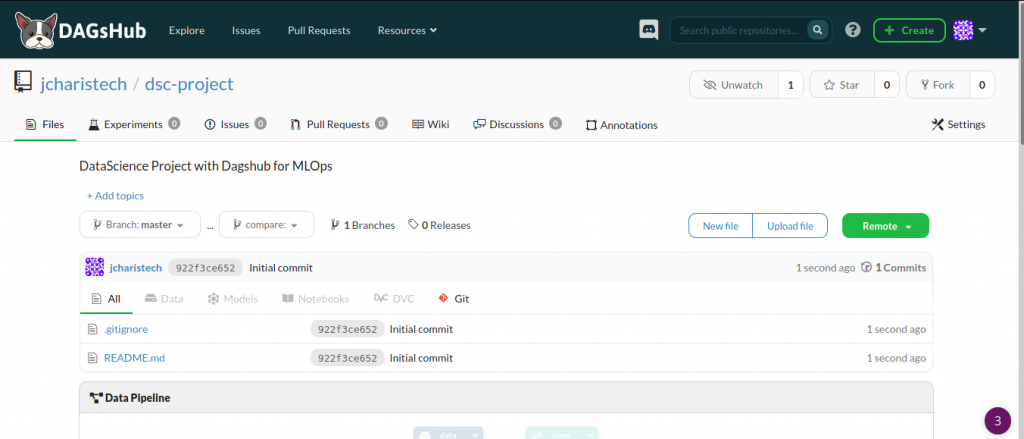
Viola we are done with the repository creation.
How to Clone Repository to Your Local Machine
Dagshub offers two main options to clone this repository to your local workstation via either git or dvc.
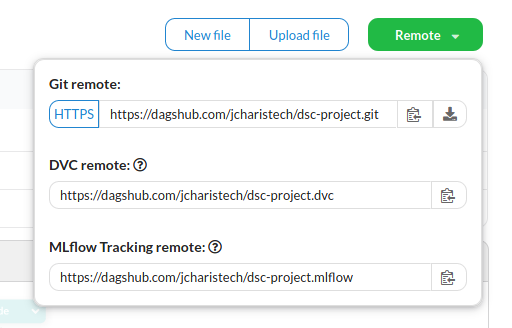
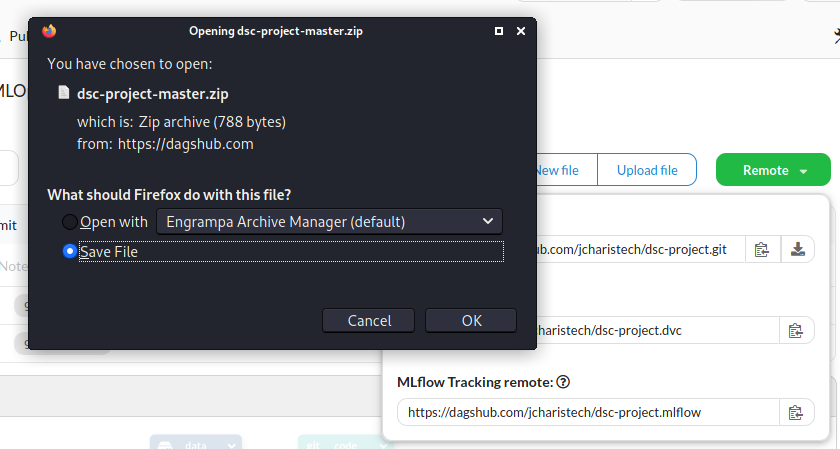
You can also download it manually
You will have to install dvc via pip. Alternatively there is fastds – a simply library developed by the DagsHub team to simplify how to use git and dvc with their platform. Fastds is a wrapper around Git and DVC making it easy to type one command instead of two when working on your project.The short hand for ‘fastds’ is fds.
You can install these as below
pip install dvc fastds
To clone the repository you can use git clone as below
git clone https://dagshub.com/jcharistech/dsc-project.git
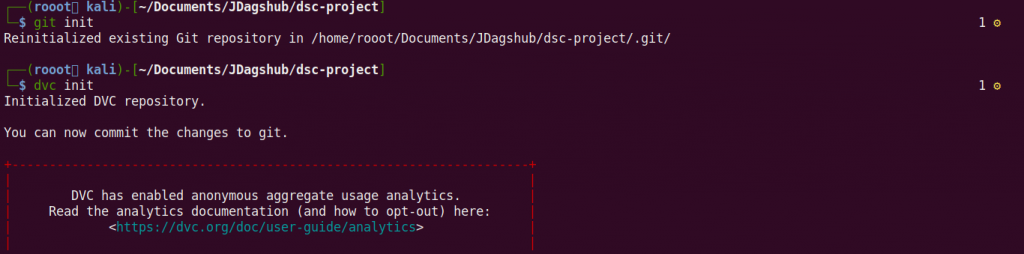
This will automatically initialize this folder and create the .git file tor track the git aspect of this project. However in case you already have a project on your system that is not yet on Dagshub you can use the git init to initialize the folder .
git init
Remember that Git was originally built for source code version control and not for data version control hence you will have to use dvc to manage the data aspect and git for all other things. Because of this you must initialize that folder using dvc.
dvc init
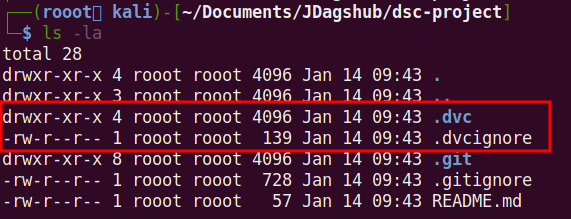
Once you initialize this repository/folder with dvc it creates .dvc hidden directory and a .dvcignore file. Alternatively if you used the dvc url from dagshub(ie. https://dagshub.com/jcharistech/dsc-project.dvc) this would already be included.
How to Version Control Your Data Using DVC
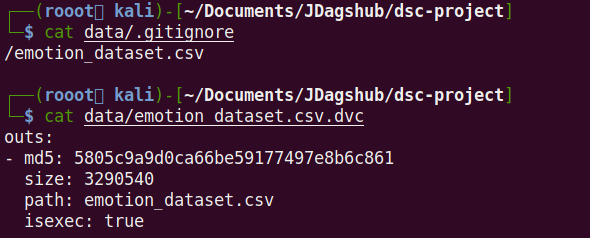
After initializing your directory using git and dvc. You can use dvc to track your datasets and artifacts. To begin the process you will have to add the data that you want to track via the dvc add command eg
dvc add data/emotion_dataset.csv

This command will inform git to not track or upload this dataset. It will add this path to the .gitignore file and also create a .dvc file with the file integrity details and hash. Because of this you also have to add these two files , the modified .gitignore file and the your_dataset.csv.dvc file to track this on your git repo.
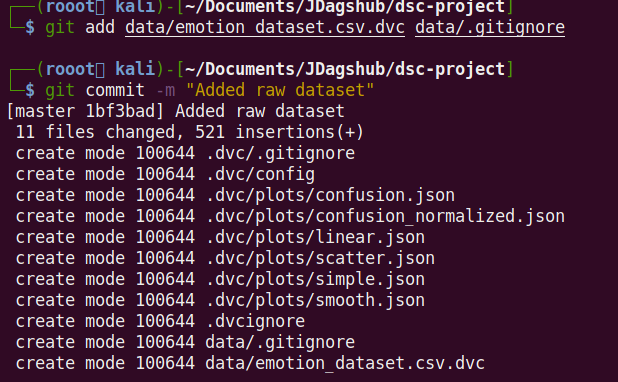
Tracking the changes made consit of two commands
git add and git commit as below
git add data/emotion_dataset.csv.dvc data/.gitignore

To effect the changes as usual you will need to commit to git
git commit -m "Added raw dataset"
You can now push via git and then via dvc. For git you use
git push
Storing Data With DVC
With DVC you have several options of where to store your actual dataset that you are tracking.DVC offers several storage options such as
- local storage on your system
- Google Drive
- Google Cloud Storage
- AWS S3 Bucket
- Azure
- Dagshub Storage
- etc
In our case we will be pushing the data to Dagshub Storage which comes with your Dagshub account. Cool right!!
With the dvc remote add command you can configure your remote storage with any of the providers above and use dvc push to push/upload your data.
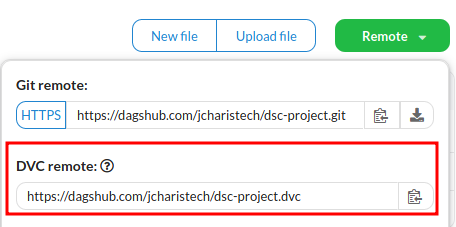
For Dagshub Storage we ca use the following commands. To find the remote url for your dagshub account you can check this one out
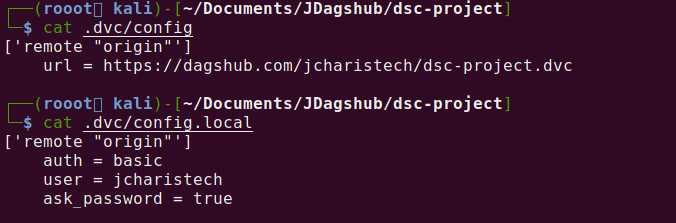
You can now modify them as expected. U. Don’t forget to specify –local , this ensures that your personal authentication info is not tracked and committed to git but always kept local.
For password authentication you can use the following per your need
- Token Based
- dvc remote modify origin –local password <Token>
- Password Based
- dvc remote modify origin –local ask_password true
- SSH Based
- dvc remote modify origin –local ssh_password true
dvc remote add origin https://dagshub.com/<DagsHub-user-name>/hello-world.dvc
dvc remote modify origin --local auth basic
dvc remote modify origin --local user <DagsHub-user-name>
dvc remote modify origin --local ask_password true
This will add this remote path to your dvc config path
git commit .dvc/config -m "Configure Remote"
You can now push your data to your storage
dvc push -r origin

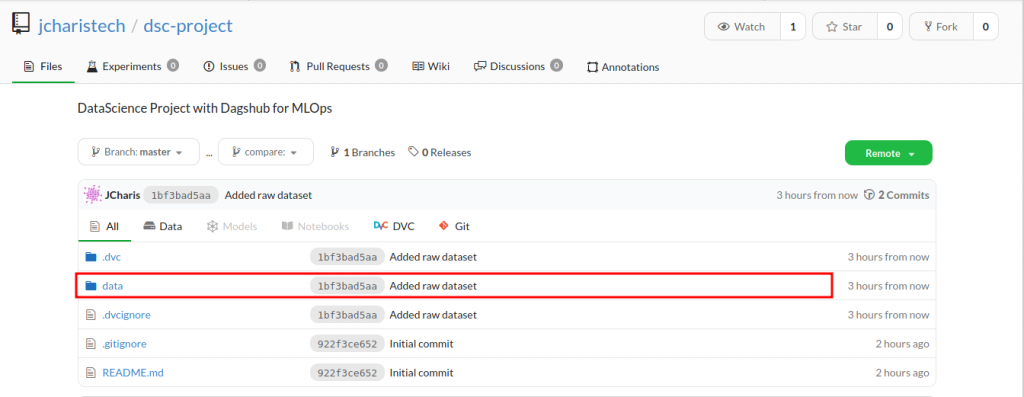
If we go back to check our dagshub platform we can see the effect implemented
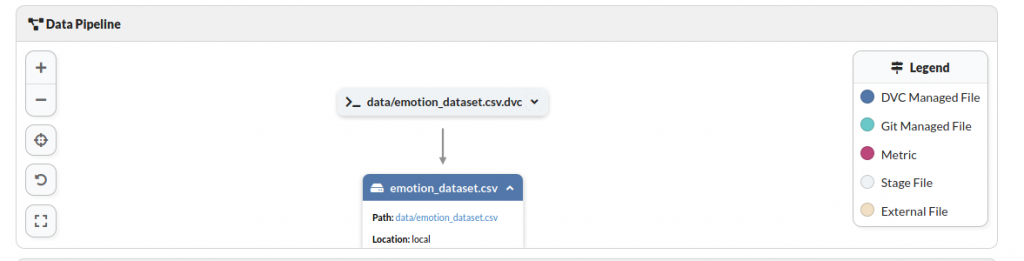
You can also check the data pipeline section to see the flow chart of the dataset.
To conclude we have seen how to use Dagshub and DVC. To summarize the entire workflow you can use the following commands
Thank You For Your Time
Jesus Saves @JCharisTech
By Jesse E.Agbe(JCharis)