Streamlit makes the creation of ML tools and Data Science Apps very easy and simple. In this tutorial we will see how to deploy our awesome streamlit apps on Amazon Web Services(AWS). We will be using the aws EC2 service. EC2 is an elastic cloud compute that acts as a virtual server that operate in the cloud. Let us see the steps of deploying our streamlit app.
STEPS
- Create An AWS Account
- Create An Instance
- Configure Our Custom TCP port to 8501
- SSH into Our Instance/AMI
- Setup our python environment and run
- Keeping the App Continuously Running
- Configure a custom domain name
Create an AWS Account
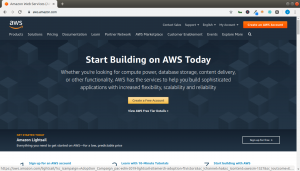
The first step is to create an aws account if you do not have one. You can sign up for the free 12 tier.
Then you can login into your aws management console
Create An Instance
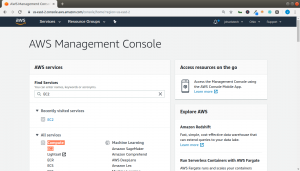
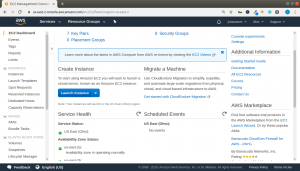
The next step is to create an instance. An instance is a virtual server for running applications. We will first search for EC2 on our AWS managament console or select under the All services Compute EC2.
And then click on the create instance
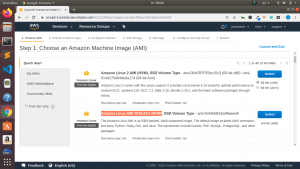
We will then select an AMI(amazon machine image) which is a template that has the operating systems and tools to run your application. There are several AMI you can select such as Ubuntu Server,( doesn’t have python already installed) . But we will be using the Amazon AMI 2018 which has python already installed.
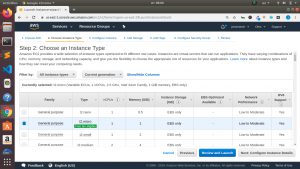
Then for the instance type we will choose the t2.micro as below
Follow through the steps till the step 6
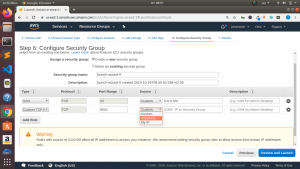
Configure Custom TCP Port
Since streamlit normally runs on port 8501 or 850* we will have to create a new firewall run to allow a custom port for our streamlit app. So at the configure security group we will a custom tcp port by clicking on the ADD RULE. Then select Custom TCP Port . In the port range you will then change it to 8501. Finally you will select anywhere in the sources section.
The click on the review and launch.
You will be prompted to create a new key pair which is what you will use to ssh into your instance. This key should be kept secure since you may not get it back again after this section.
SSH Into Our Instance
There are several methods of getting access into our instance using SSH. If you are on a unix based system such as Linux or MacOs you will have ssh already. For windows users you will need to use putty and puttygen to gain access. You will have to change the permissions on the your_key_pairs.pem file using
chmod 400 your_key_pairs.pem
The First Method for SSH (Easy method)
ssh i your_key_pairs.pem ec2-user@your_public_dns_address
The Second Method For SSH( For Every Day Use)
To use this method you will need to make some changes to your ssh config file.So we will cd into our ssh folder from the root of your system or home section with
cd .ssh
In case you do not have a config file you can create it with
touch config
Then open the config file and place in the following
Host your_simple_name_to_login
	HostName Your_IP
	User ec2-user
	IdentityFile /home/path/to/your_keypair.pem
After that you can easily ssh into your AWS EC2 instance by using
ssh your_simple_name_to_login
Now we are in our AWS Ec2 Instance.
Setting Up Our Environment for Python
Since we already have python2 installed we will rather install python36 or more in order to run our streamlit app. So we can install it using yum or apt(for ubuntu users)
sudo yum install python36
Then we can further install git or use curl or wget to get our app into our instance
sudo yum install git
After these two installation we can use git to get our app within our instance. If you are on windows you can also use winscp to copy your files to your instance. You can also use scp on linux to copy it to your instance.
git clone link_to_your_repository.git
The next step is to cd into our downloaded repository and install our required packages either using the requirements.txt file or simply using
python36 -m pip install streamlit
This will add streamlit to your cloud aws system.
Running An App
streamlit run app.py
Perfect our app is running on the specified port.
We can now see our app live on the external url.
The next issue is to keep our app running and live even after we have close or logout of our ssh session.
So we will have to install tmux on our system
sudo yum install tmux
We will then use tmux to create a session and run our app in that session as follows
tmux new -s st_instance
Inside this session/window we can now run our app
streamlit run app.py
To see all the tmux session you can use
tmus ls
To attach to a running tmux session you can use
tmux attach-session -t st_instance
We are now safe to logout off our ssh session without the app stopping.
Configure a Custom Domain Name
If you noticed our ip address is not that user friendly so the next step is to configure our ip and DNS to your domain name which will need a different tutorial.
You can also check the entire video tutorial here
Credit : @alex T
You can check the Streamlit official docs here
For more about Machine Learning with python you can check these materials
Python Cookbook
Python For Data Analysis
Python Data Science HandBook
Python Machine Learning by Sebastian Raschka
Hands On Machine Learning with Scikit-Learn & TensorFlow
Mastering ML with Scikitlearn
Monetizing ML
Building Machine Learning Systems With Python
Thanks alot for your time
By Jesse E.Agbe(JCharis)
Jesus Saves
You made some good points there. I did a search on the subject matter and found most guys will go along with with your website.
Glad it was helpful. Thanks a lot
Thanks for sharing excellent informations. Your web site is very cool. I’m impressed by the details that you have on this website. It reveals how nicely you understand this subject. Bookmarked this web page, will come back for extra articles. You, my pal, ROCK! I found simply the information I already searched all over the place and simply could not come across. What a perfect site.
Thanks a lot, Glad it was helpful
Looking forward to reading more. Great blog article.Really looking forward to read more. Awesome.