Dagshub is the platform where people build data science project. It is built on the shoulders of open source tools that we are mostly familiar with in the Data science and AI field.
One of the cool features of Dagshub is the Annotations feature. It is an integration of Label Studio into Dagshub, making it easier to label your datasets easily without installing label studio, all in the cloud.
By the end of this tutorial we will explore
- How to work with the Annotations in Dagshub
- How to use Label Studio
- How to annotate clinical/medical data using NER and Label Studio
- etc
Let us start.
First of all you will have to create an account on DagsHub if you don’t have one yet and then create a repository. Every repository on DagsHub has the Annotations Tab already integrated to it.

In order to work with the Annotations you will need to create an annotations project.You can do so by clicking on the Annotations tab and then the button to create a project.
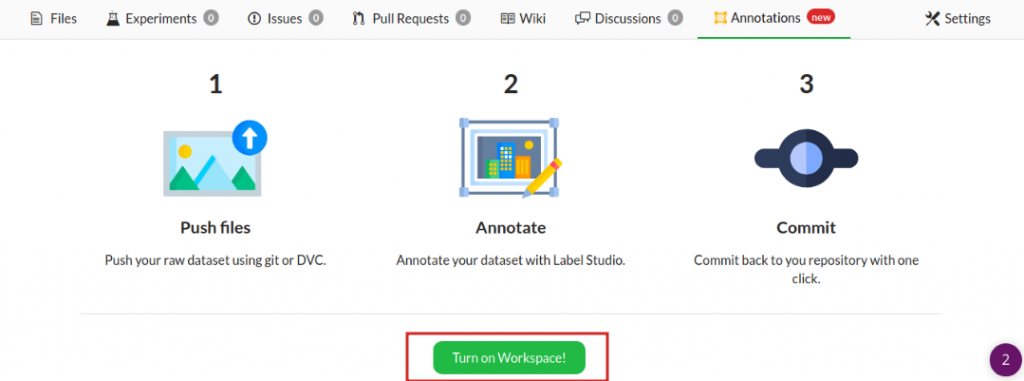
The steps for working with the Annotations is quite simple. It consist of just 3 steps
- Push Data
- Annotate
- Commit

Next by clicking on the workspace button, Dagshub will provision your Label Studio workspace where you can do your annotations.
Give the Project a name
After it is ready, it will open a new tab with the pre-configured label studio.
Working with the Label Studio
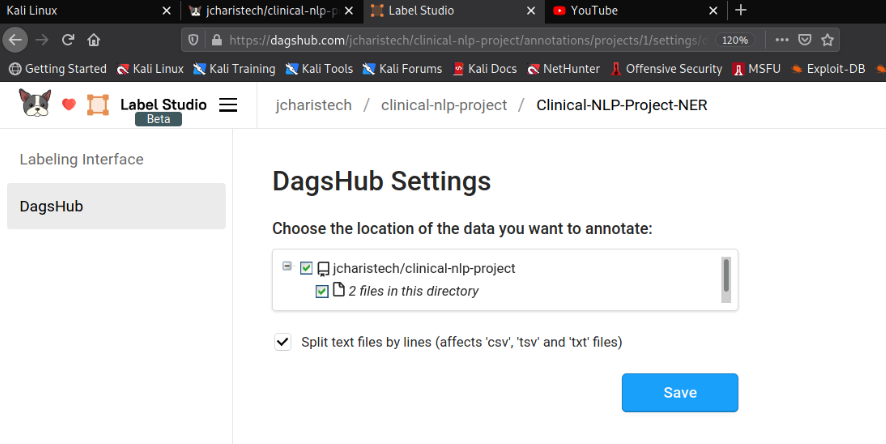
On Dagshub, there will be two main sections, one for configuring your label called the Labeling and the DagsHub Settings for specifying which data to annotate
DagsHub Settings For Selecting which data to annotate
Selecting the Labels to Use on the Labeling Interface
Before you select the labels, you can choose any of the template per your project. These templates ranges from Computer Vision, NLP,Conversational AI,Images,Video,etc
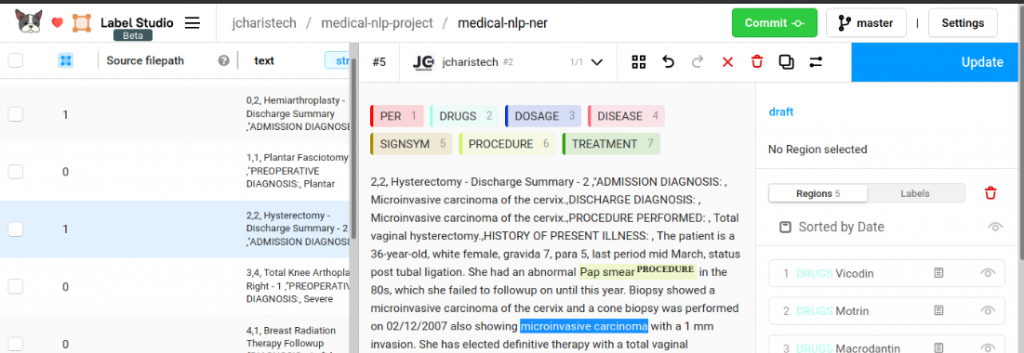
In our case we will be picking NLP specifically NER for Named Entity Recognition of Medical/Clinical Terms
You can then specify what terms or labels to add and the color you want for each label

In order to do the text annotation, you will have to pick the label and then select or highlight the particular word or term you want to annotate and it will automatically assign the chosen label to the text.
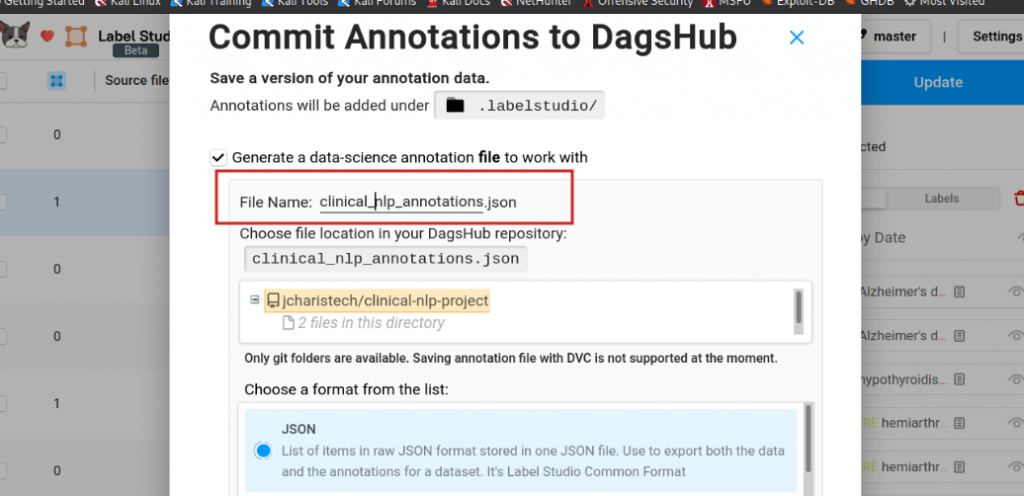
After annotating your text you can now submit and then commit to save changes to your repository. The results can also be export into various formats such as json,csv,json-min,connll33.
During the saving of committed results you can specify the location and name for saving the annotations.
We have now seen how to do text annotation using label studio and DAGsHub. You can check out the video tutorial below.
Thanks for your time
Jesus Saves
Jesse E.Agbe(JCharis)