Containerization refers to the process of virtualization in which all the components of an application are bundled into a single container image and can be run in isolated user space on the same shared operating system.
The containers are basically a fully functional and portable cloud or non-cloud computing environment surrounding the application and keeping it independent from other parallelly running environments.[wiki]
In order to containerize you application, you can use any of the following software such as
- Docker
- Rocket(rkt)
- Podman
- Lxc
- Containerd
Containers makes deployment quite easier and effective. By the end of this tutorial you will learn how to
- Productionize an application using Docker via Dockerfile
- How to build images
- How to connect multiple containers together via networking
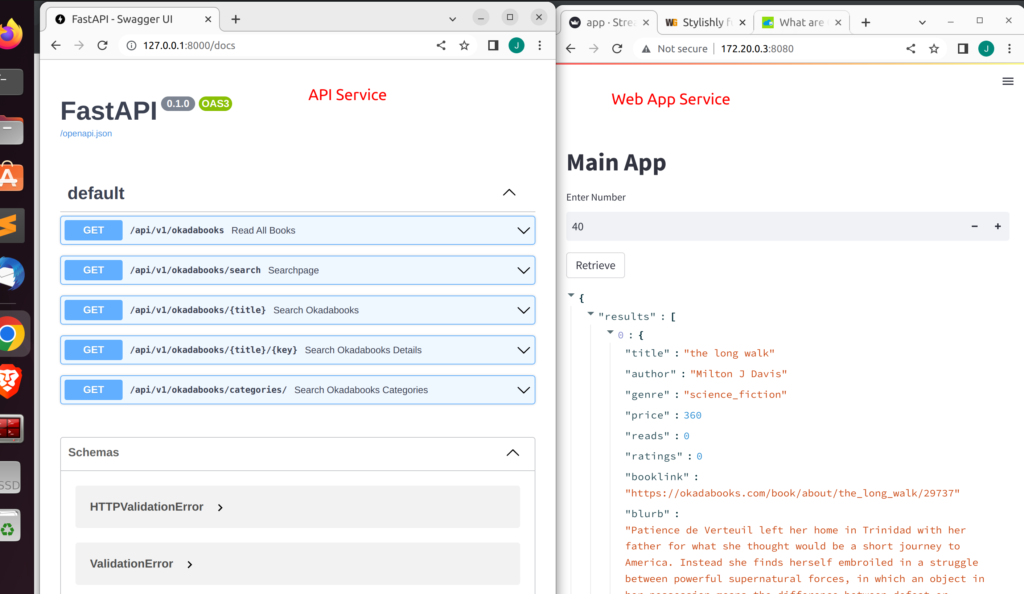
The idea of this tutorial is to build two applications and connect each container with each other. We will build a web app using streamlit that makes
a HTTP request to another API service built with FastAPI.
In order to accomplish this we will be using docker compose to simplify our work but first let us ensure that each works via a single Dockerfile.
Building the Streamlit Web App
This will be the front-end web app from where users can select the number of books they want to see. We will do so using streamlit number_input widget (st.number_input).
import streamlit as st
import requests

def fetch_book(number):
	base_url = "http://myapi:8000/api/v1/okadabooks?limit={}".format(number)
	resp = requests.get(base_url)
	return resp.json()


def main():
	st.title("Main App")

	number = st.number_input("Enter Number",1,100)
	if st.button("Retrieve"):
		results = fetch_book(number)
		st.json(results)


if __name__ == '__main__':
	main()
Deploying our Streamlit Web App
Using a Dockerfile – a file that contains the layers of instructions required to build images and containers, we will deploy our streamlit app.
Below is the content of our Dockerfile for streamlit
FROM python:3.10

WORKDIR /app

COPY requirements.txt ./requirements.txt


RUN pip3 install -r requirements.txt

EXPOSE 8080

COPY . /app


CMD streamlit run --server.port 8080 --server.enableCORS false app.py
We can then build an image from our dockerfile using the following command
docker build -t streamlitapp .Next we can spin up containers from our image via
docker run -d -p 8080:8080 app:latestAs you can see our application is working correctly when we navigate to the url specified
Building and Deploying API Service with FastAPI
The API service will be built with FastAPI and will have various endpoints.
Each endpoint will have access to a simple dataset (you can use a database if you want) that contains various books that can be found on Okadabooks.com.
Below is the Dockerfile we will be using
FROM python:3.10

WORKDIR /app

COPY requirements.txt ./requirements.txt

RUN pip3 install --no-cache-dir -r requirements.txt

EXPOSE 8000:8000

COPY . /app

CMD uvicorn app:app --host 0.0.0.0 --port 8000 --reload
#CMD python app.py
# the --port(8000) must match with the EXPOSE port above(8000)
We can spin another container from the image via
docker run -p 8000:8000 -t -i fastapiHow Containers Communicate with each other
In order to allow containers to communicate with each other you can use the
default bridge network and then check the IP Address of each container and access them accordingly.
docker network inspect container_id | grep addressHow to Connect our Web App to our API from two different containers
Docker Containers by default share the same network with the name bridge.
To check for the various networks you can use
docker network ls
As you can see there is a network named bridge
Every container will be attached to this network by default. However you can
make a custom user defined network. This is the approach we will be using.
Once a user defined network is made, you can connect each app to this new network. The containers can talk to each other by referencing their container name (–name container_name ) for each url endpoint. Docker uses the container name as the hostname.
Let us create a simple container from our API image to demonstrate this
docker run -p 8000:8000 -it fastapi --name myapi
Hence incase you want to make an HTTP request to our API service having the name ‘myapi‘ we can then specify it as ‘http://myapi:8000‘.
Using User Defined Network For Containers to Communicate with each other
- Create a custom network
docker network create myown-net- Start a container and connect it to that network
docker run --net myown-net --name container_name -d imagename- Start another container and connect it to that network
docker run --net myown-net -it imagename bin/bashManaging Multiple Containers Using Docker Compose
Docker compose allows us to bundle and build multiple images and containers together. This is optimal and efficient when you are running multiple applications that communicate with each other. With docker compose you can manage multi container environment.
Let say in our case a web app built with streamlit making HTTP request to another API service built with FastAPI.
To do so you will need to create a yaml file with the name docker-compose.yaml
and then specify the various services and instructions as below
Docker compose file for two services
version: "3"
services:
  api:
    container_name: myapi
    build: booksapi/.
    command: "uvicorn app:app --host 0.0.0.0 --port 8000 --reload"
    ports:
      - "8000:8000"
    networks: #user defined network bridge for all containers
      - jcnet

  app:
    container_name: myapp
    build: .
    command: "streamlit run --server.port 8080 --server.enableCORS false app.py"
    ports:
      - "8501:8501"
    networks:
      - jcnet
networks:
  jcnet
How to run docker-compose.
To run our application we will first build it and then use the docker-compose up to spin it up and run it.
docker-compose build
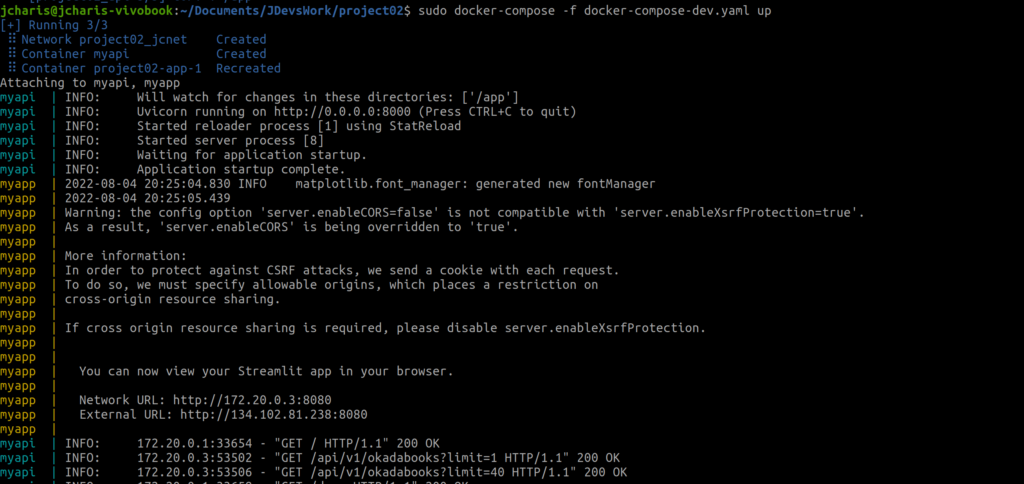
docker-compose up
# run in detached mode using -d
docker-compose build -dAlternatively you can specify the file using the ‘-f’ argument with the filename as below
sudo docker-compose -f docker-compose-dev.yaml up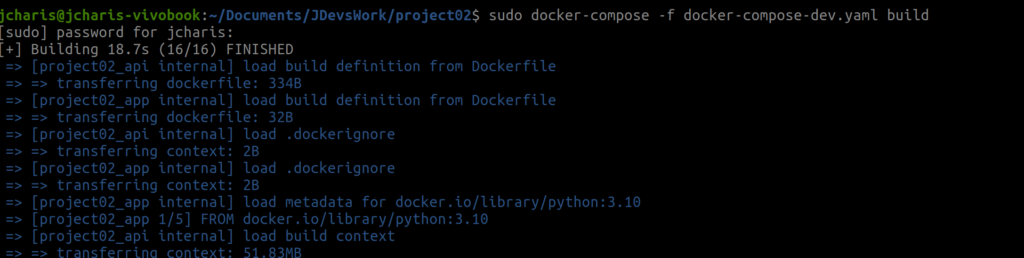
As you can see we have seen how to run a whole service using docker and docker-compose where each container communicate with each other over the same network.
To shutdown the services you can use docker-compose down command as below

You can also check out the video tutorial below
Thank You For Your Time
Jesus Saves
By Jesse E.Agbe(JCharis)